AVAYA
Avaya
AuraTM Utility Services
MyPhone Quick Reference
Issue
Release
©2010 Avaya Inc.
All Rights Reserved.
Notice
While reasonable efforts were made to ensure that the information in this document was complete and accurate at the time of printing, Avaya Inc. can assume no liability for any errors. Changes and corrections to the information in this document may be incorporated in future releases.
For
full legal page information, please see the documents,
Avaya
Support Notices for Software Documentation, 03-600758, and
Avaya Support Notices for Hardware Documentation, 03-600759.
These documents can be accessed on the the documentation CD and on the Web site, http://www.avaya.com/support. On the Web site, search for the document number in the Search box.
Documentation disclaimer
Avaya Inc. is not responsible for any modifications, additions, or deletions to the original published version of this documentation unless such modifications, additions, or deletions were performed by Avaya. Customer and/or End User agree to indemnify and hold harmless Avaya, Avaya's agents, servants and employees against all claims, lawsuits, demands and judgements arising out of, or in conjunction with, subsequent modifications, additions or deletions to this documentation to the extent made by the Customer or End User.
Link disclaimer
Avaya Inc. is no responsible for the contents or reliability of any linked Web sites referenced elsewhere within this Documentation, and Avaya does not necessarily endorse the products, services, or information described or offered within them. We cannot guarantee that these links will work all of the time and we have no control over the availability of the linked pages.
Copyright
Except where expressly stated otherwise, the Product is protected by copyright and other laws respecting proprietary rights. Unauthorized reproduction, transfer, and or use can be a criminal, as well as a civil, offense under the applicable law.
Trademarks
Avaya, Midsize Business Template, Communication Manager Express, MultiVantage, and INTUITY are trademarks of Avaya Inc. License terms for this library are available at http://www.indyproject.org/License/index.en.iwp.
All non-Avaya trademarks are the property of their respective owners.
Third-party Components
Certain software programs or portions thereof included in the Product may contain software distributed under third part agreements (“Third Party Components”) which may contain terms that expand or limit rights to use certain portions of the Product (“Third Party Terms”). Information identifying Third Party Components and the Third Party Terms that apply to them is available on Avaya's Web site at: http://support.avaya.com/ThirdPartyLicense/.
The Third Party open source copyright license text file is available in the following directory on the installation DVD:
<DVD_ROM_Drive>:/licenses
For more information regarding the Third-Party components and terms for Midsize Business Template, see http://support.avaya.com/Copyright.
Avaya Support
Avaya provides a telephone number for you to use to report problems ir to ask questions about your contact center. The support telephone number is 1 800 242-2121 in the United States. For additional support telephone numbers, see the Avaya Web site: http://www.avaya.com/support.
Contents
Overview of the MyPhone Administration Reference 4
Change your SIP PIM Password 8
Extension to Cellular (EC500) 9
View and manage your devices 10
Logging off 13
The Avaya AuraTM MyPhone Quick Reference Guide describes the MyPhone feature of Utility Services and how to administer simple call routing patterns.
MyPhone is a Web-Based utility that lets you manage some of the features of your phone, including the Extension to Cellular or EC500 and Enhanced Call Forward features. These features are typically managed by the system administrator in larger systems. The FollowMe feature of MultiVantage Express is no longer available and has been replaced by the EC500 and Enhanced Call Forward features.
You can access the following interfaces of MyPhone depending on the type of phone you are using:
SIP Interface
H.323 Interface
You use the same extension and security code to log on to the SIP and H.323 interfaces of MyPhone.
To log on to the MyPhone Configuration Manager, perform the following actions:
Type the following URL in your
Web browser:
https://<IP Address of Utility
Services>:8443/MyPhone/MyPhone
Where,<IP Address of Utility
Services> is the IP Address of Utility Services – ask your
System Administrator for help in getting the URL for the MyPhone
Administration Web Interface.
Tip: Add this Web site
to your bookmark file if you frequently access the
MyPhone
application.
Accept the security certificate
generated in your browser. The system displays the MyPhone Home
page.
Tip: Avaya recommends you install the security
certificate in your
browser as prompted so that the certificate
is automatically
recognised in the future.
To install
the certificate:
Click View Certificate on the security warning;
Click Install Certificate. The certificate is installed.

In the Extension box, type the extension number.
In the Security Code box, type the security code and click Login.
You can use the SIP interface of MyPhone to do the following:
Manage your contact list
Manage your profile details
Change your SIP PIM Password
Manage your call settings
View and manage your devices
Manage your phone features
On the left navigation menu, click My Contact List to access the My Contact List page. By default, the My Contact List is displayed when you log on to the SIP interface of the MyPhone Configuration Manager.

Use the My Contact List page to do the following:
View the groups and contacts
in you contact list.
To do so, view the groups on the My
Contact List page. Each group contains the specified
contacts.
Tip: For the field codes, click Help
on the My Contact List page.
Modify a group.
To do so,
click the group name on the My Contact List page.
View detailed information of
a contact.
To do so, perform one of the following actions
Click the handle of the contact you want to view.
Select the option button of the contact and then click View.
Delete a contact.
To do
so, select the option button of the contact and click Delete.
Add a contact.
To do so,
click the Add Contact link and enter the fields, as required.
Click Submit.
Add a group.
To do so,
click the Add Group link. In the Group Name box,
enter a name for the group and click Submit.
Note: The group name consists of 32 UTF-8 characters and is a logical name for organisational purposes. It is not a list name for addressing purposes via SIP contact URIs.
View the speed dial list.
To
do so, select the Speed Dial List link.
On the left navigation menu, click My Profile to access the My Profile page.
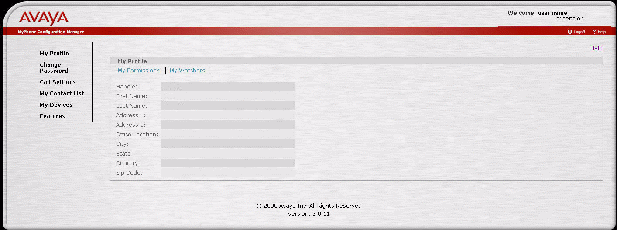
Use the My Profile page to do the following:
View the current settings of your SIP PIM profile.
Specify whether you want to
allow other users to track your availability on the SES system.
For
more information, see the My Permissions
section.
Determine the users who are viewing your presence in the SES system. To do so, click the My Watchers tab.
Tip: For the field details, click Help on the My Profile page.
Click My Permissions to specific whether you want to allow other users to track your presence in the SES system.
Permissions
You can managed the following permission types:
Allow All
Allows all the
administered SIP users to view your availability on the SES system.
Block All
Blocks all the
administered SIP users to view your availability on the SES system.
By default, the permission type is Block All.
Contact List Only
Allows
only the administered SIP users added to your contact list to view
your availability on the SES system.
To change a permission type, perform the following actions:
In the Change Permission Type field, click the permission type you want to set.
Click Change.
Access Control List
You can manage the Access Control List as follows:
Allow
List
List the users permitted to view your availability on the
SES system. To add a user to Allow List, enter a valid handle in
the box below the Allow List and click Allow.
Block
List
Lists the users who are blocked to view your availability on
the SES system. To add a user to Block List, enter a valid handle
in the box below the Block List and click Block.
On the left navigation menu, click Change Password to access the Change Password page.
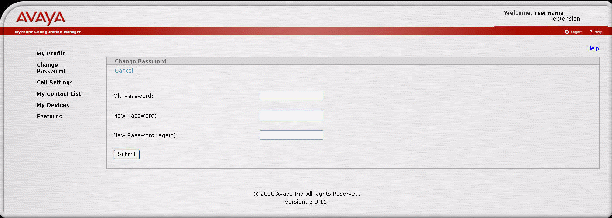
Important: You must log off from your phone before you can change the SIP PIM password.
To change the SIP PIM password, perform the following actions:
In the Old Password box, type the old password.
In
the New Password
box, type the new password.
Use only numeric characters for the
new password. The length of the new password must be 6-8
characters.
Important: Changing the password of the SIP interface changes and synchronises the SES and CM passwords.
In the New Password (again) box, retype the new password and click Submit.
Tip: Click Help on the Change Password page for field details.
On the left navigation menu, click Call Settings to access the Call Settings page.
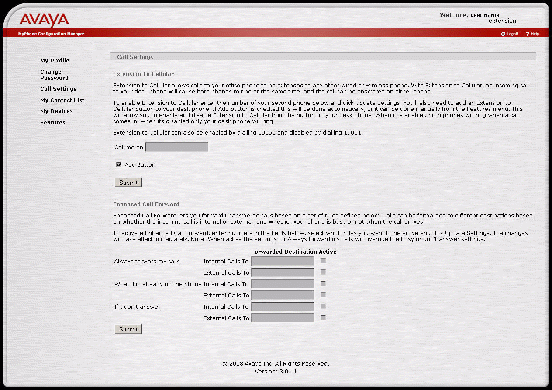
Use the Call Settings page to manage the Extension to Cellular or EC500 and Enhanced Call Forward features. Use these two features of MyPhone when you are out of the office.
The EC500 feature provides a different and more sophisticated integration for mobile users. It allows the incoming call to be bridged in parallel to both your desk phone and your mobile phone, which provides parallel operation and extended call identification. EC500 also extends the feature set of your phone system to a mobile phone, which is made more convenient by the Avaya One-X Mobile Client. You can use the Avaya One-X Mobile client to initiate calls from the mobile phone so that you can provide a single number to the outside work and have access to Communication Manager features.
To activate the EC500 feature, perform the following actions:
In the Call me on box, enter the cellular phone number.
Select Add Button.
Note: Selecting the Add Button automatically adds an Extension to Cellular button to your desk phone. Otherwise, you manually assign an Extension to Cellular button to your desk phone from the Features menu.
Click Submit.
Use the Enhanced Call Forward feature to forward unanswered calls based on a set of defined rules. Calls can be forwarded to different destinations based on whether the incoming call is internal or external and whether your phone is busy or not when the call arrives.
You can set the following rules:
Always
forward my calls
Forwards the internal and external calls to
numbers that you set in the Forwarded Destination
boxes.
When
I'm already on the phone
Forwards the internal and external calls
to numbers that you set in the Forwarded Destination
boxes when your number is busy.
If
I don't answer
Forwards the internal and external calls to
numbers that you set in the Forwarded Destination
boxes when you do not answer the call.
Note: The Always forward my calls rule overrides the other two rules.
To set the Enhanced Call Forward rules, perform the following actions:
Enter the numbers in the Forwarded Destination fields as required.
Select Active.
Click Submit.
On the left navigation menu, click My Devices to access the My Devices page.
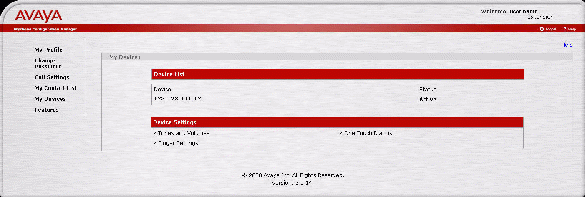
Use the My Devices page to access the following information of your SIP phone:
Ringer volume, headset volume, speaker volume, and ringer cadence
Ringer settings
One Touch Dial list
Device configuration
Note: These features are only available for the supported devices.
Tip: Click Help on the My Devices page for the field details.
On the left navigation menu, click Features to access the Features page.
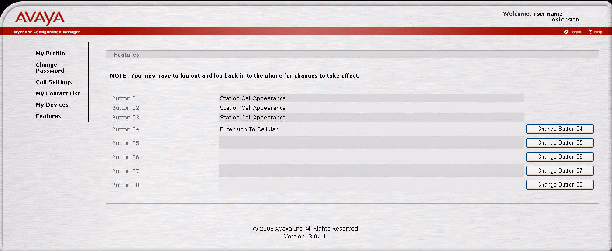
Use the Features page to change or assign a feature to a phone button. By default, Button 01, Button 02, and Button 03 are assigned as Station Call Appearances. You cannot change or assign features to these buttons.
To change or assign a feature, perform the following actions:
Click Change Buttonxx, where xx is a number. The displays the Feature Button Configuration for button xx page.
From
the drop-down menu, select the feature you want to assign to the
button.
The system displays a brief description of the feature.
Some of the features require additional configuration information.
Note: You can assign a feature to a phone button only if the button is enabled by the administrator.
Click Change MyPhone Feature Button.
You can use the H.323 interface of MyPhone to do the following:
View your MyPhone details
Change the H.323 password
Manage your call settings
Manage your phone settings
On the left navigation menu, click MyPhone to access the MyPhone page. By default, the MyPhone page is displayed when you log on to the H.323 interface of MyPhone Configuration Manager. The following table lists the MyPhone field details:
Table 1: MyPhone Page Field-Details Table
|
Field |
Description |
|---|---|
|
Displayed Name |
Displays the name of the user. |
|
For Extension |
Displays the extension number of the user's phone. |
|
Station Type |
Displays the model number of the station. |
|
Display Language |
View and set the local language of your phone. |
|
Ringing Pattern |
View and set the ringing pattern of your phone. |
The procedure to change the H.323 password is similar to the procedure to change the SIP PIM password. For more information, see the Change your SIP PIM Password section.
The procedure to manage the calls settings of the H.323 interface is similar to managing the calls settings of the SIP interface. For more information, see the Manage your call settings section.
The procedure to manage the phone features of the H.323 interface is similar to managing the phone features of the SIP interface. For more information, see the Manage your phone features section.
Click Logoff.
The system displays the MyPhone Home page.